Closet Wall Edition
Now that you're hooked on my mad skillz on Pinterest and my bedroom, I thought that I would showcase the other half of my bedroom for the real deal ingenuity that would make my mom say that I should have been an
First, let's start with the BEFORE picture so you can see what I was working with.
 |
| No center support and no shelf. LAME. Obvious a boy lived here before me. And? Let's talk about the second rod 6" above that rod (barely visible here). WTF? |
Then, with the help of my dad, we picked up a laminated piece of particle board found at Home Deport or Lowes in various widths and lengths. Lucky for me, they had one in the (almost) right length and width.
After a stop at Target to get literal bargain bins ($5.54/each) for the above closet storage and some cloth Closetmaid collapsible bins ($7.99/each), I managed to create storage and minimize the clutter.

Now, I knew that I needed something major to cover that stupid, random storage space. I had mulled over an idea to have floating canvases, a tension rod with cafe curtains...but I settled on oversized canvases that would hide the bins, but be a piece of art.
 |
| Ta Da! Clutter is hidden! |
To the Pinterest!


From these two pins, I liked the idea of a blossoming tree as I already have the flowers and cherry blossoms through the seasons on my bed wall. I liked the idea of the leaves, but wasn't sure I could incorporate them into the canvases.
I settled on a hybrid of the two pins. I would try to make flower buds from the fabric plus paint tree limbs. For my background? I used the leftover Colorado Gray from the bed wall! Score!
(I was better about taking pictures this time.)
What you'll need:
- Sponge brushes (varying sizes - paint & Mod Podge)
- Brushes (I used a 1 1/2" for the tree)
- Paint
- Fabric
- Scissors
- Mod Podge
- Patience
 |
| Give your canvases a couple of solid coats of your background color. |
 |
| While the paint dries on the background, go ahead and make some leaves. *I made circles believing I could make something similar to my canvas flowers, but it looked poopy. |
 |
| Watching paint dry. |
 |
| I assembled the canvases as they would hang. Taking my brush, I gooped up a lot of paint and swirled the tree branches out from the trunk. I like twisty branches. |
 |
| To add some depth to the branches and trunk, I added brown shading to show that the branches stemmed from all parts of the tree, not just the top & bottom. |
 |
| I made a form to trace with scissors to make a good looking leaf shape. |
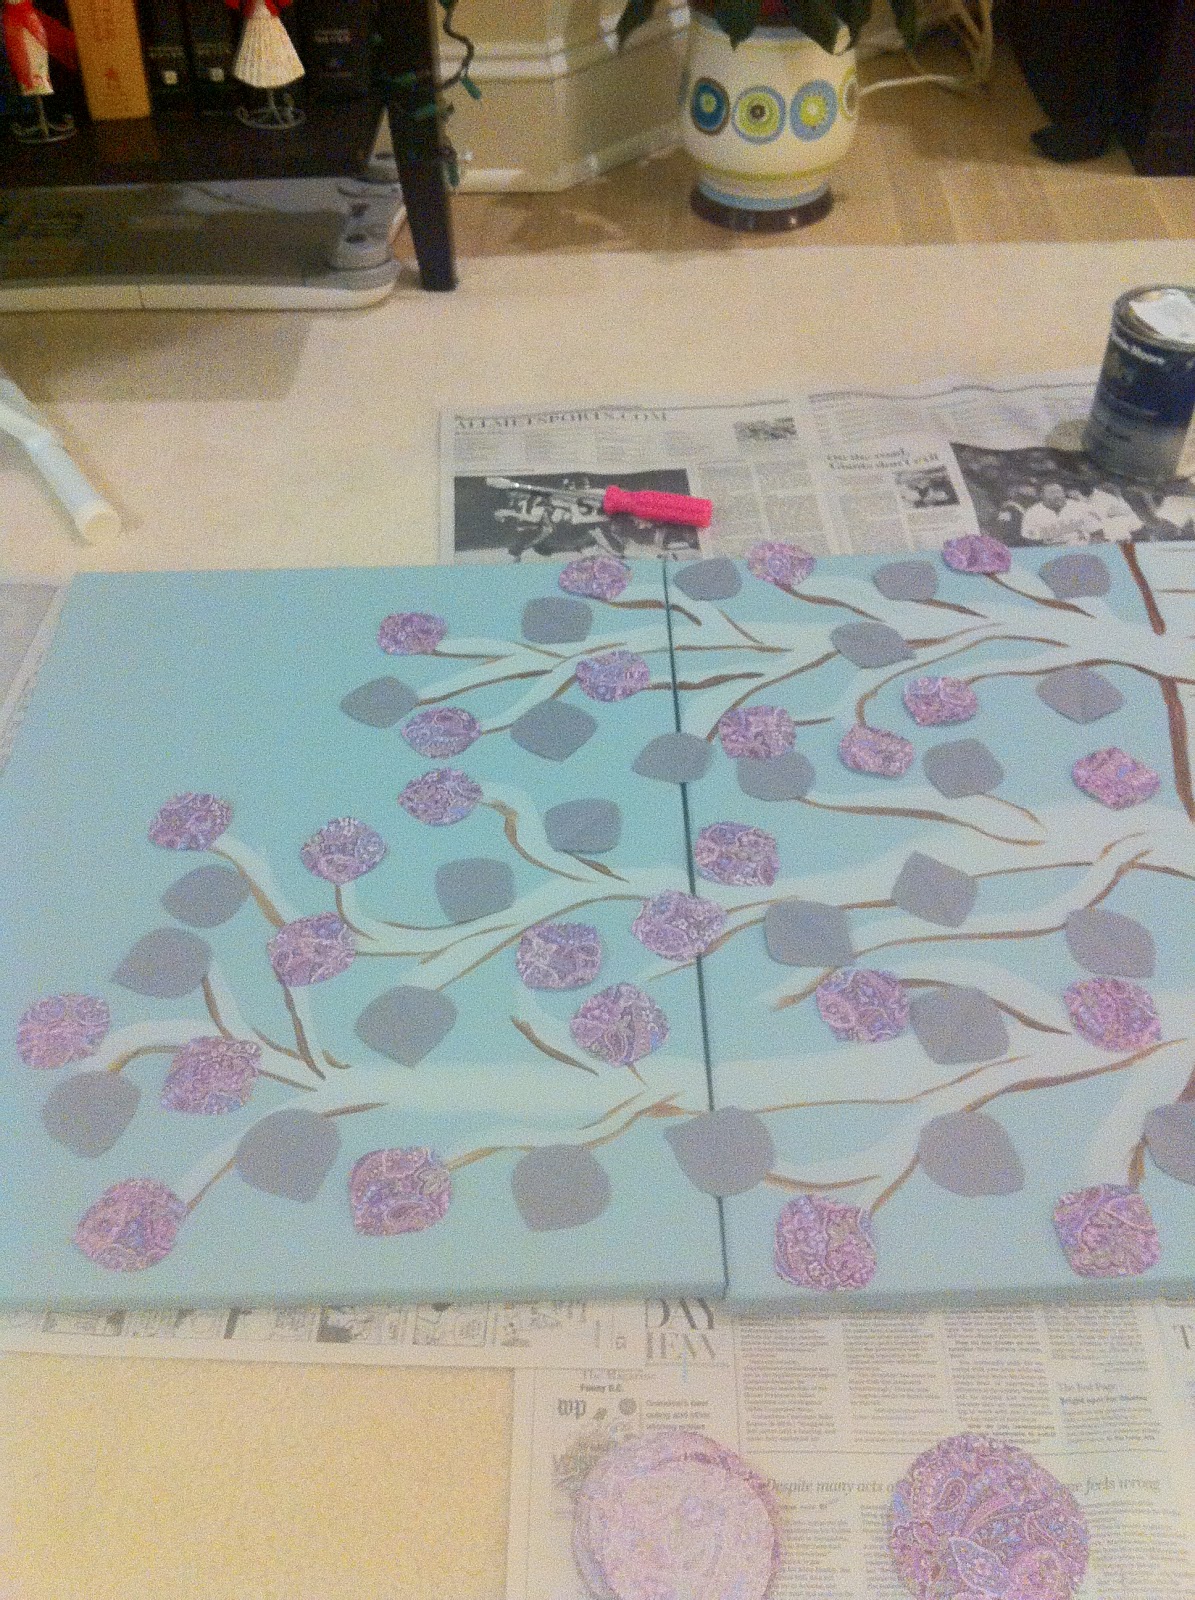 |
| As I made a batch of leaves, I started to place them on the canvas to see what looks good so the colors are distributed evenly and logically on the limbs. |
 |
| Overall, the tree looks balanced and like an ethereal tree from the depths of Pinterest. |
I suggest working methodically from the closest leaves to the farthest so you're not sweeping them out of place as you move about the canvas. And don't forget the overall coat to the canvases to make sure the sheen is consistent.
Once dry to the touch (which is about 30 minutes), go ahead and hang those suckers to start enjoying your craftiness and cover your clutter.
 |
| Glorious! |

Stay tuned for Part 3 where I talk about how to make those curtains from Part 1 and leave enough for other decorations around the room *cough* artwork *cough*

DUDE! Well done.
ReplyDeleteAmazing! Like, duh.
ReplyDelete